Pages

  • twitter
  • facebook
  • rss

CHARLIE BROWN TREES!

HI EVERYONE,

I'm still here but been very busy with orders from my wonderful customers.

I had planned on getting my decorating done this week but it didn't happen - maybe this coming week if all goes the way I plan.

I did close all Christmas orders on my website so I don't get backlogged as Christmas gets closer and this is why you haven't seen me on your blogs commenting and looking at all your beautiful Christmas decorating and family happenings....I know I'm missing out on so much but rest assured I will visit you soon!

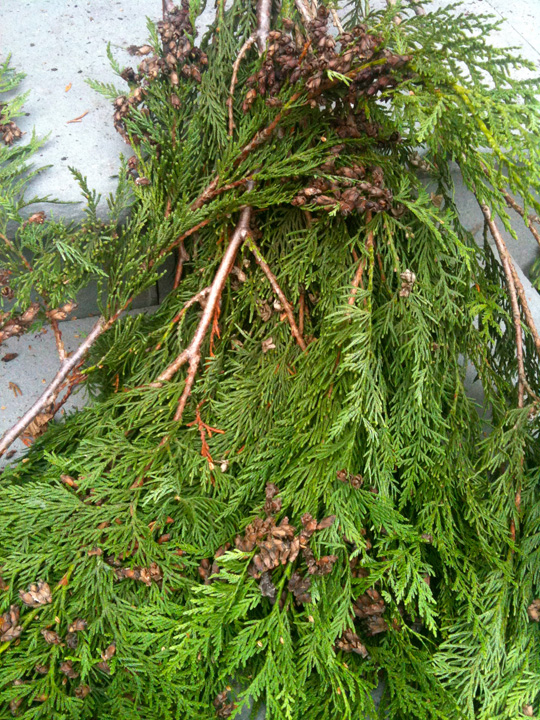
I did need to get out of the house yesterday and while out we went to a little local shop and I bought a 6 ft. Charlie Brown tree and today Doug tried to get it shaped up...but he couldn't understand why he had to 'shape it' - it looks like a tornado hit it so no matter what he did to it he said it didn't look much different - he did good though. Now I just need to adjust the branches where I want them.

I have a 3 ft. and 4 ft. tree like it and they fast became my favorite decoration for the season.
Anyway I wanted a larger one for my Mercury ornaments being the collection is getting bigger.
Hopefully after it's decorated it will look better.
One thing I'm not sure of is whether to put lights on t or not...any ideas on this?

So here's the 6 ft - still needing much work and I'm really not sure just where or which room it will go in - Doug says it is going to be our main tree...he's not bringing the other larger one up as long as we have this one. So I guess I had better work some magic here!
And YES IT LOOKS CRAZY and NO...IT'S NOT SHAPED THE WAY IT WILL LOOK IN THE END!

 My 4 ft. tree that held my Mercury ornaments last year...not sure what I will put on it this year.

And my sweet little 3 ft. kitchen tree in the Tin Dough Riser...my original Charlie Brown tree and my favorite.


So this my dear blogging friends is why I'm MIA and will be yet for another week at least.
Blessings,
Karen
[ Read More ]

A Prize-Winning Wall

I am so jazzed!

My suitcase wall

stairs 006 (2)

won the November contest over at the DIY Club!

This contest comes with an amazing prize package.  I think I should wrap it up and put it under the Christmas tree…but I probably won’t show that much self restraint!

Winning this contest is especially appreciated today, as I am making my daughter’s baptism dress and it’s not going particularly well  <sigh>.  I think I like sewing quilts and table runners.  They don’t have to FIT anything!

[ Read More ]

French Bench

I’ve been trying to organize my picture files, which I find almost as exciting as organizing my sock drawer. However, one good thing came out of it (and it wasn’t finding my matching blue-striped fuzzy socks, although I really would like to) – I came across one of my summer projects that never got to be posted!  Poor thing.

Anyway, based on my French chocolate coffee table (which spawned a few more similar projects  here, here, and here), I decided to transform this old bench…

kidpics 003

…into a ‘vintage French’ piece!

My original idea was just to sand the top down to bare wood, and paint the base of the bench.

kidpics 004

But do you see those wide panels that run along the front and the back? The bench told me (if you have read my blog, you’ll know that furniture often talks to me) that those spaces were perfect for more typography. So before I knew it (not really—it took forever) I had sanded the entire bench down!

kidpics 005

I only worried about removing the old finish. All the knicks, scrapes, and dings are welcome to stick around.  That’s character.

Next thing was to choose the perfect graphic (all of my French ads have been found at The Graphics Fairy), print it out, and then take it to an office store to be copied onto an overhead transparency.

Here I am at work…

kidpics 008

If you’ve seen my other projects, you’ll notice that I’ve gotten a little smarter. I put this piece up on a folding table so I didn’t have to contort myself on the floor so much!!

And in case you’re wondering…I am using a plain old bottle of acrylic paint. (Others have suggested using paint markers or a Sharpie, but I don’t think they distress as well. You can use whatever suits you best.)

kidpics 012-1

I really dressed up for this impromptu photo shoot, can’t you tell?

kidpics 013

This is what the bench looks like before any distressing or staining.

kidpics 014

I actually used lines from two other ads for the front and back panels of the bench.

kidpics 015

They may or may not make sense with what the top says!

kidpics 016

After the paint was completely dry, I distressed the lettering with sandpaper, and then wiped on a coat of Minwax Antique Walnut stain. I finished the bench with a couple of coats of Minwax Polycrylic.

This little bench went with me to an outdoor market in July. It was one of the last projects I finished before going, so it missed out on a ‘formal’ photo shoot in my home! But here’s what it looked like outside on a beautiful July day.

bellas 001

bellas 002

You may not have noticed it, but those two side panels actually hide a lower cubby. I envision this as an entry bench with a place to hide shoes! (I painted the inside black.)

bellas 005

bellas 017

So that’s my little French Bench. If this looks like a project you would like to try, be sure and check around for a used overhead projector. Lots of times you can find them at school surplus sales, or you might even be able to borrow one from your local school.

bellas 016

Ahh, summer….

****************************************************************

Linking up to these great parties:
Coastal Charm’s Nifty Thrifty Tuesday Topsy Turvy Tuesdays
Domestically Speaking’s Power of Paint Someday Crafts’ Whatever Goes Wednesday
Hookin’ Up with House of Hepworths No Minimalist Here’s Open House Thursday
Friday Remodelaholic 2805
My Simple Home Life’s Simple Creations Friday Miss Mustard Seed’s Furniture Feature Friday
Funky Junk’s Saturday Night Special The DIY Show Off
Primitive & Proper I Heart Naptime
Beyond the Picket Fence’s Under $100 Party My Uncommon Slice of Suburbia
Perfectly Imperfect {Primp}
Mod Vintage Life Sisters of the Wild West
Thrifty Décor Chick One Month to Win It
The Graphics Fairy My Repurposed Life
[ Read More ]

Rosemary Tree Maintenance Tips


Those petite rosemary Christmas trees you see at the home improvement store, in the market and at your local nursery are charming to look at, but can be a bear to maintain.

Rosemary Tree Maintenance

Because they look and smell so wonderful, they're almost irresistible. If you just have to adopt one of these seasonal beauties, make sure to take a look at the tips below.

Rosemary Tree Care

[ Read More ]

Hello, Yellow!

It’s time for a good old-fashioned furniture makeover, don’t you agree? 

I picked up this little dresser at Deseret Industries (Utah’s version of Goodwill) during the summer.  Prices at DI  are a little erratic, but in this instance, it was a good thing!  At $30, it took me about 0.5 seconds to decide this one was coming home with me.

chair 002

I sanded down the top and the decorative backsplash and re-stained them with Minwax Antique Walnut.

yellow 006

I had a can of “oops”  yellow paint that I used for the body…

yellow 004

…and I brushed white paint over the appliques and in the grooves.

yellow 002

I distressed this piece more than I usually do.  I actually don’t embrace the “shabby” style in general, but it seemed to work for this piece.

yellow 003

So that’s it.  Short and simple!  Hope you like it!

yellow 005

*******************************************************

This project was featured at Whimsical Perspective, Sisters of the Wild West, and


Linking up here:

Coastal Charm’s Nifty Thrifty Tuesday Topsy Turvy Tuesdays
Domestically Speaking’s Power of Paint Someday Crafts’ Whatever Goes Wednesday
Hookin’ Up with House of Hepworths No Minimalist Here’s Open House Thursday
Friday Remodelaholic 2805
My Simple Home Life’s Simple Creations Friday Miss Mustard Seed’s Furniture Feature Friday
Funky Junk’s Saturday Night Special The DIY Show Off
Primitive & Proper I Heart Naptime
Beyond the Picket Fence’s Under $100 Party My Uncommon Slice of Suburbia
Perfectly Imperfect {Primp}
Mod Vintage Life  
Thrifty Décor Chick  
Meg & Mum’s My Repurposed Life
[ Read More ]

Winter Urns, a tutorial

Computer issues and a tight schedule have kept me from the computer of late. Hoping this tutorial is not too late for some of you.........but then again, the design principles shown here could also be employed for interior arrangements set into floral foam. Well, enough "disclosures", let's move onto the the creation of a traditional winter arrangement
My favorite is the spruce tree toppers. They add the element of height and bulk
Inserted straight up, a cluster adds an instant base

Dogwood sticks; red, yellow, etc. continues the element of verticality

Additionally set in an upright fashion
As we move on the best advice I can impart is, use a variety of evergreen forms and textures. For example if all evergreen bundles chosen have a similar needle, say all small like the spruce, nothing would "pop". A great choice here is the long needle of white pine to contrast with the short needle of the spruce.
Beginning at mid-level onto the bottom, insert at a 90 to 45 degree angle as you begin to fill these lower gaps 
(all creations will have a Dr. Seuss look mid-point, don't worry!)
LOVE coned cedar! Another texture, form (droopy) and the addition of mini cones
All inserted at the rim of the urn as a "spiller"
A few set at a 90 degree angle to bring the coned ends higher towards eye level
Whopper cones, the "jeffrey" cones.

My "have to haves", red berries and in this case, hard plastic red berries for season long impact. Actually, many seasons...... Try to avoid styrofoam, they burst and will look like popcorn mid winter. The real winterberries soon turn black and drop


Real alder cones on faux stems. Why faux stems? To hold the clusters of diminutive pinecones. Another benefit of faux is the pliable stems

Boxwood. A great mid filler and another contrasting texture


Always stepping back, I will tend to add more of the previously used until satisfied. Does this help? Don't be timid, and have fun!

General Tips;
1) buy twice as much as you think you will need
2) think "filler", "thriller" and "spiller"
3) Use opposing textures
4) When complete, mist with water and then an anti-dessicant, such as 'wilt-pruf', it holds in moisture and adds double the lifespan of your creation

I would love to see your efforts, send me photos

Debra


[ Read More ]

Homemade Spicy Cranberry Sauce


If you like canned cranberry sauce, you'll love the taste of your own homemade version. Homemade cranberry sauce has a sweet-tart flavor that is the perfect foil for mild tasting fowl like turkey. It has a fresher and brighter flavor than the canned varieties I've tried. It's also super easy to make. I have four variations on basic homemade cranberry sauce that amp up the taste and add a hint
[ Read More ]

The Last Straw

I mentioned that changes were coming….can you guess what I was referring to now??

house 001

Yes, the “Red Hen Home” has been listed for sale!  Apparently,  not being able to park the truck in the garage (see it in the driveway?) was the LAST STRAW for my dear husband.  For the first time in eight years, he was ready to talk about moving!

We have found a house we love about 4 miles away from here, and the sellers have accepted our offer for it, contingent upon the sale of our home.

We would appreciate any and all prayers and good wishes on our behalf.  Let me tell you, undertaking a move after 8 years, 6 children, and a staircase remodel is not something we take lightly!

************************************************

P.S.  If you know of anyone looking to move to the Layton/Clearfield area, please send them my way!

[ Read More ]

Sleigh Bells from the Ivy Cottage–Guest Post

Today Red Hen Home welcomes it’s first EVER guest poster!  Amanda from the Ivy Cottage was the inspiration behind my Bedroom Bling nightstands,
image
and my beadboard pennant banner debuted on her lovely blog!
image
 
We both hope you’ll enjoy her fun Christmas project!
*****************************************
 
Happy Holidays, Red Hen Home Readers!

My name is Amanda and I journal over at


The Ivy Cottage Blog!

My blog is filled with ideas, inspiration, DIY, tutorials, and fun.  Stop by and check out some of my latest projects!  Now, on to my post . . .

My mother-in-law inherited some BEAUTIFUL antique sleigh bells a few years ago.  Every Christmas when she gets them out and drapes them across her mantel, it takes everything I have not to snatch them and run away yelling mine, mine, mine!
 
LOL, well, I do love those sleigh bells, but I cannot afford to buy some of my own.  Here is my little knock off tutorial for Vintage Sleigh Bells!
Materials:
*  Old leather belt
*  Acrylic paint and brush
*  Towel
*  Jingle bells
*  Measuring tape
*  Awl & hammer
*  Wire
 
 
I found this leather belt at the Salvation Army for $6.  I chose it because the leather was cracked and it had a worn look.  Unfortunately, the color was a little bit too yellow.
 
 
To cut down the yellow tone in the belt, I used the above acrylic paints to break down the color.
 
 
I started by painting a small section of the belt with the dark paint.
 
 
Then I used the towel to rub the paint into the cracks and remove the excess.
 
 
Afterwards, I went back with the copper paint and rubbed it on for a few accents.
 
 
Next, I measured out every 2 1/4 inches with the measuring tape and marked it was a sharpie.


To make the holes in the leather, I used an awl and hammer.
 
 
Make two holes side by side.
 
 
Be sure to put a piece of scrap wood underneath the belt when you are making the holes.
 
 
These are the jingle bells that I used from Hobby Lobby.
 
 
Cut a piece of wire about 4 inches long and loop it through the jingle bell.
 
 
Put the ends of the wire through the holes . . .
 
 
Then twist and secure them on the back.  Repeat this until you have attached each of the jingle bells.  I also ended up putting a piece of gorilla tape over the wire on the back to make sure that it does not scratch any surfaces that it sits on.


Thanks so much for sticking around til the end of my post!  Be sure to pop on over to The Ivy Cottage Blog and check out some of my other Holiday projects here.
 
[ Read More ]

Related Posts Plugin for WordPress, Blogger...